Are you looking for a GREAT gift for that person who has everything? You want it to be hand-made, but functional? How about a box of YOUR handmade cards!! This box was designed by Sandra Baily another SU demo and she was so kind to share the dimensions. Make it Holiday, Birthday, anything you like! This box/purse will hold 10-15 cards with envelopes. If you want the PDF file, leave a comment and I will email you. I have not been able to figure out how to post a pdf to the blog....anyone know how? You could leave the ribbon off and use for cookies, candy for the neighbors, lots of options.
So here are some pictures to guide you, I did things a bit different for the ribbon handle, I did not like the punch interfering with the look of my purse! So I kept it all inside.
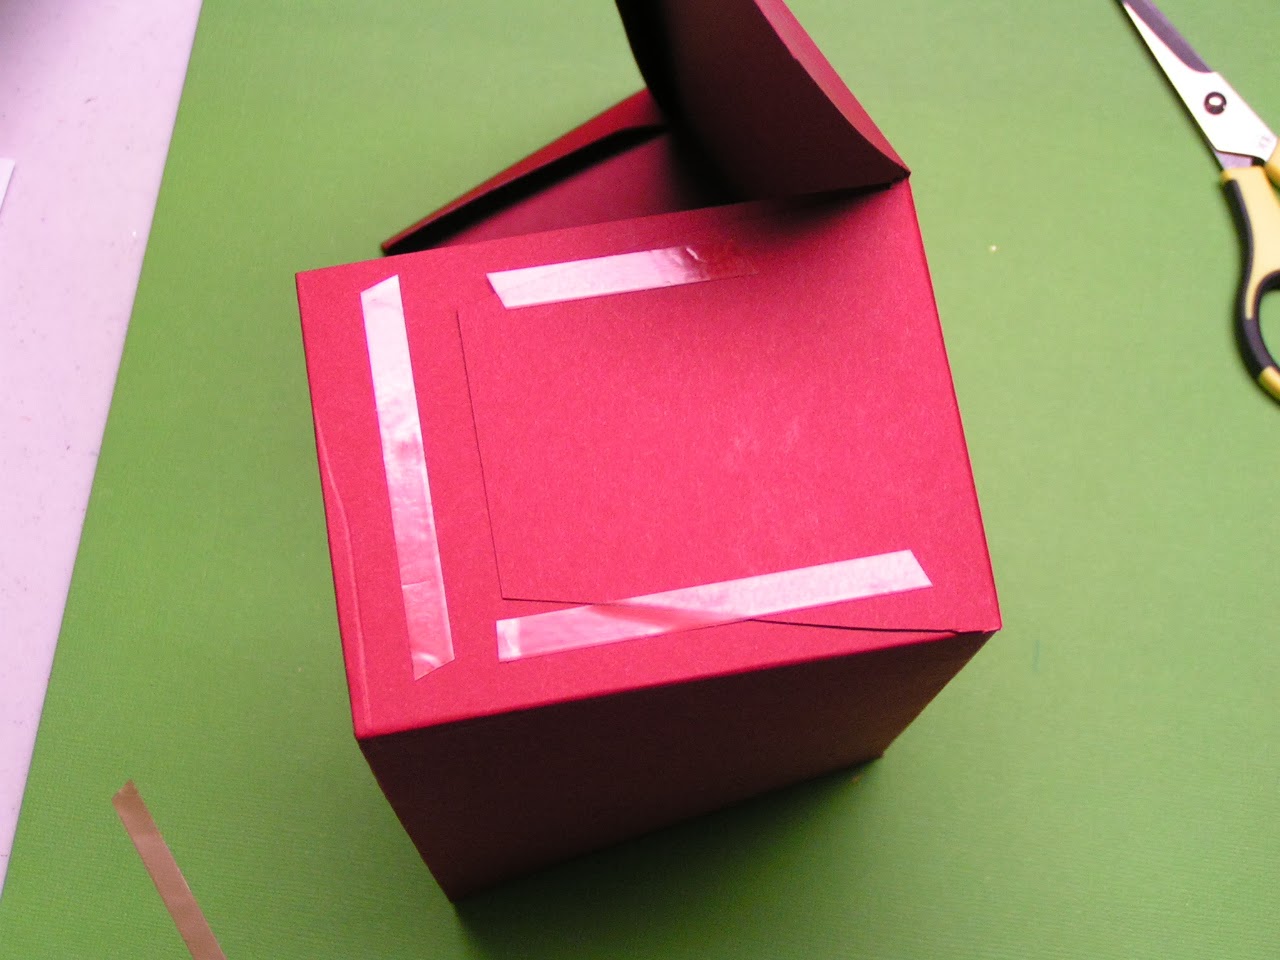
First you need a 12X12 piece of card stock. Score at 3 inches and 9 inches. Turn your paper 180 degrees and score at 1/2 inch, 4 1/2 inches, 7 1/2 inches and 11 1/2 inches. The 1/2 inch will fold in and form a nice finished edge for the top of the box. Cut up at the 4 1/2 and 7 1/2 as shown. Fold on scores and assemble.
Trim a bit off the little flap so it will not show when you fold. Add Sticky Strip and fold up the flap you trimmed.
Add more Sticky Strip and fold in the outer flaps. See how I have added Sticky Strip over the small flap......this will hold in place while you adjust and fold for a perfect box.
On the Box ends you are going to have double thickness of the 1/2 inch rim. You could probably trim down the inner fold, but I left mine as is and it worked fine. I used Tombow to adhere and pressed and held for a minute to insure the flap stayed adhered.
You can see the line of Tombow, one side is glued, now do the other side and fold and hold!
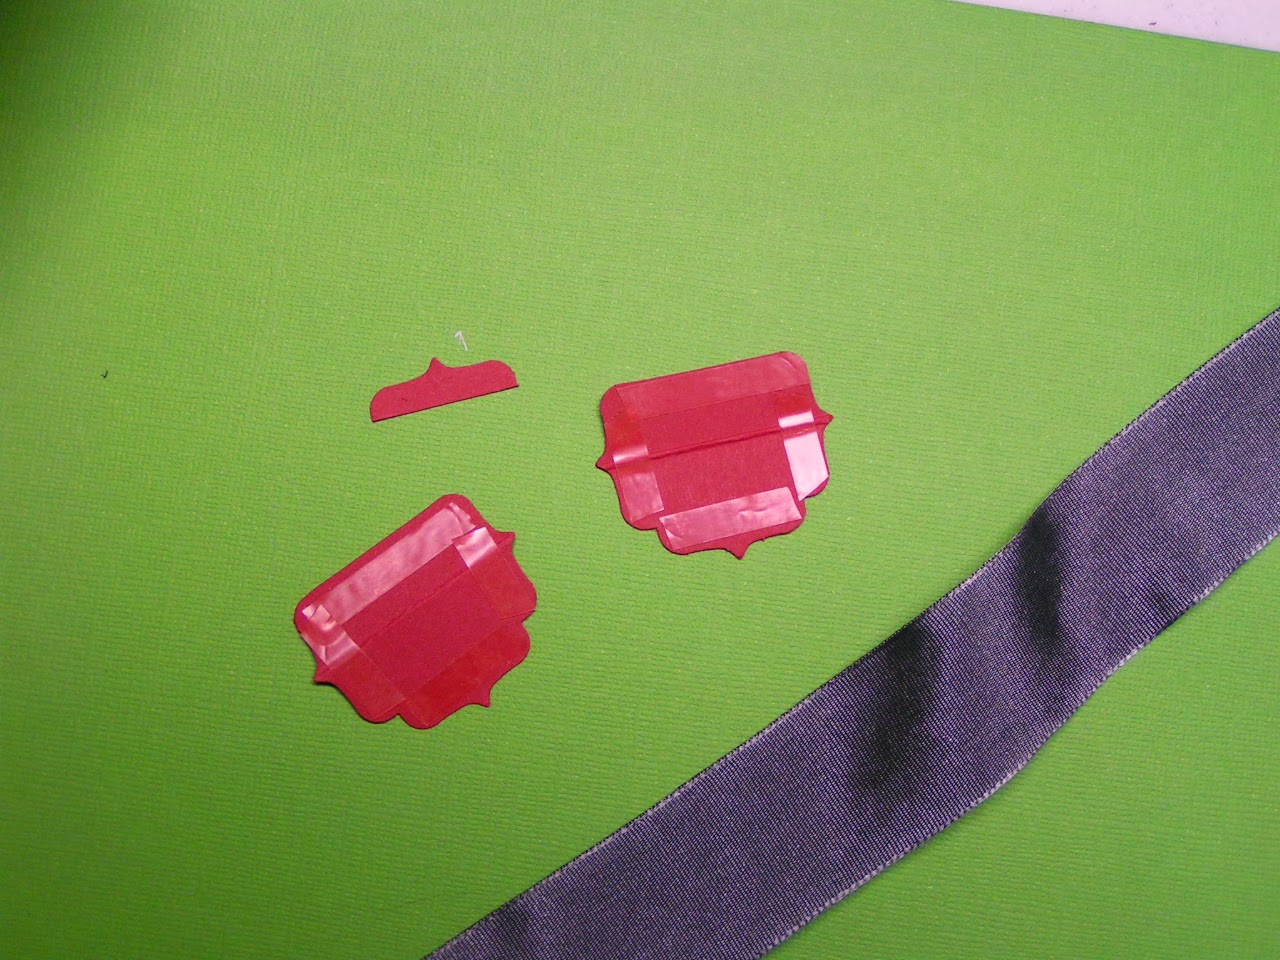
I cut ribbon in 2 pieces, each 11 inches long and punched 4 Label bracket punches. I trimmed one bracket from each punch piece. Then added Sticky Strip to each punch around the edges.
I also used a piece of Sticky Strip to adhere the ribbon to the Box.
Then covered it with the Bracket. I scored the brackets for the original version, but changed my mind....so imagine NO score marks!
I added some embossed Seasons of Style paper embossed with the Northern Flurry embossing folder. A few Smoky Slate Snow Flakes cut with the Festive Flurry Framelits, Rhinestones, Silver Glimmer paper and my Favorite Retired Basic Gray ribbon. The Sentiment is from "Best of Snow".
Let me know if you are interested in a class and I will pencil in a date. Not much time left for the Holidays, but these can be for any occasion. Like a box full of Birthday cards!!!
Here is a picture of Sandra's Christmas purses, stacked. She used a Retired punch and a brad, threading the ribbon thru a slit in the punch. A bit complicated and my ribbon was wider so I opted for another way.....That's whats great about this project, you can make it your own!!
I wanted to embellish more, but also wanted to get this on the blog.....so stay tuned, more card purses in your future! It took me approximately an hour to make this start to finish!
Shop Online 24/7:
www.kathyswanson.stampinup.net
Use Hostess Code BE7VFXKJ until November 30th to be entered for the next Mystery Hostess Drawing!! Lots of ONLINE specials 11/20-12/2, so get your order in to qualify for Mystery Hostess drawing!!


No comments:
Post a Comment